Tagging and Labeling
To edit a tag for any document, simply click on the existing tag to open the dropdown tag editor and search for your preferred tag.
Currently, any filtering or sorting will need to be reapplied after editing tags to keep the order consistent.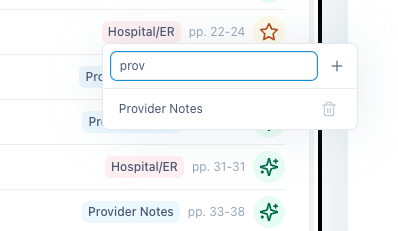
Tag Management
Tag Management
To modify which tags are used for each case, please reach out to a member of our team.Coming soon: self-serve tag management.
Edit Section Information
Date
Date
To edit a section’s date, click on the existing date to open the date picker and select your preferred date or hit clear and click away from the date picker to mark a section with “no date”.
Title
Title
To change the title of a section, click on the existing title to open the title editor and type in your preferred title, then click away from the title editor to save the changes.
Provider Name
Provider Name
To change the provider name of a section, click on the existing provider name to open the provider name editor and type in your preferred provider name, then click away from the provider name editor to save the changes.
Institution
Institution
To change the institution of a section, click on the existing institution to open the institution editor and type in your preferred institution, then click away from the institution editor to save the changes.
Relevance
Relevance
To change a section’s relevance score, click on the existing relevance score to open the relevance dropdown and select your preferred relevance score.
Grouping records
To group records together, click on the “Group by Document Type” button indicated by the stack of papers icon in the exhibit list tool section. This button will automatically group together all records with the same tag. Any sections labeled as “Provider Notes” will be sub-grouped by the name of the treating physician/provider. Click this button again to ungroup the records.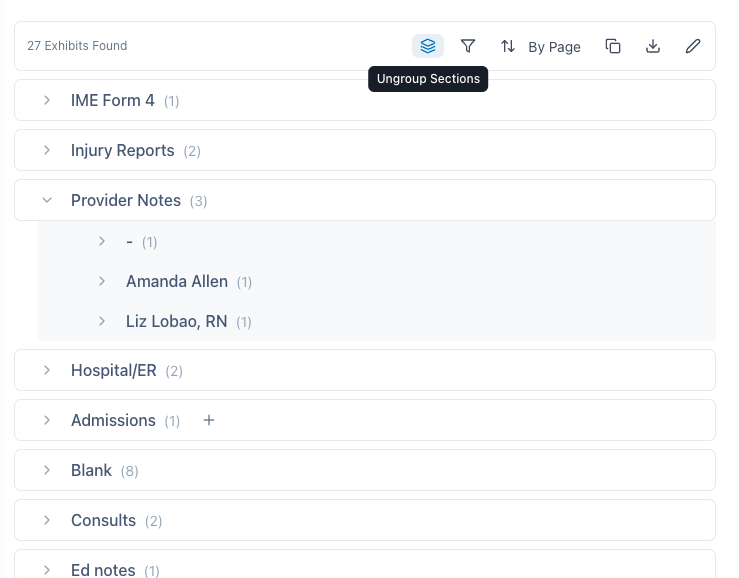
Sorting Records
Records/sections can be sorted by page number, relevance score, date, title, or the length of the document.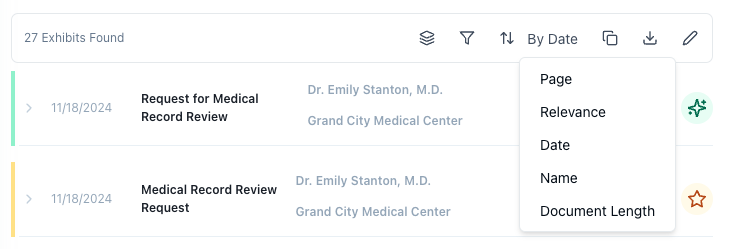

Filtering Records
InQuery gives users many different ways to filter out pages and records from the exhibit list and the final case file. Users may want to filter out pages that are blank, duplicate, or otherwise not relevant to the case, like fax cover sheets or administrative forms that are not relevant to the case. The main way to filter out records in InQuery is at the record level, which can be done by using the “Filter” button in the exhibit list tool section.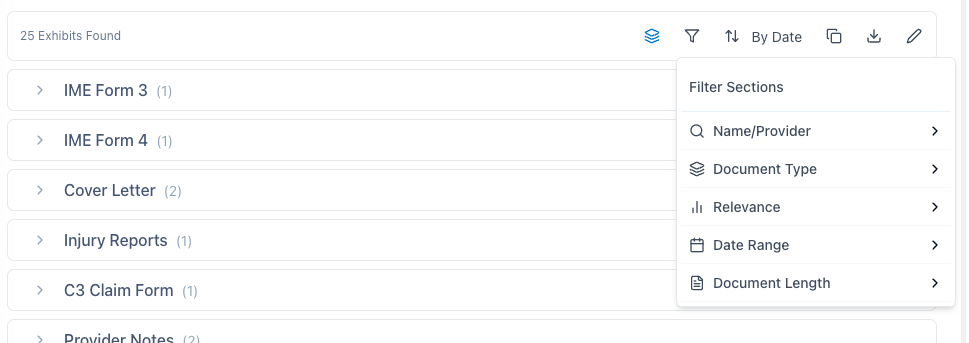
Document Name
Document Name
Document name lets you search your records by name. Simply type in part or all of the name you’re looking for and InQuery will filter the records accordingly.
Document Type
Document Type
The Document Type selector allows you to choose which records to include based on the document type. In most cases, you will want to select “All” to include all records and then filter out document types that are not relevant to the case.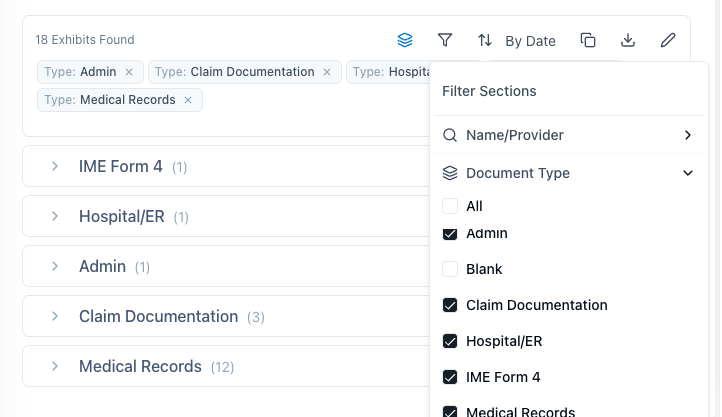
Relevance
Relevance
The Relevance filter allows you to choose which records to include based on the relevance score. In most cases, you will want to select “All” to include all records and then filter out records that are not relevant to the case.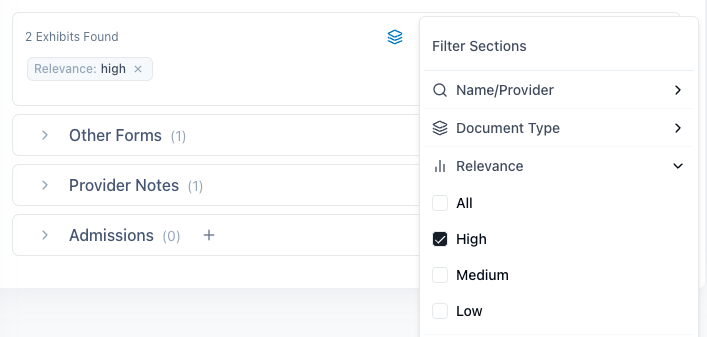
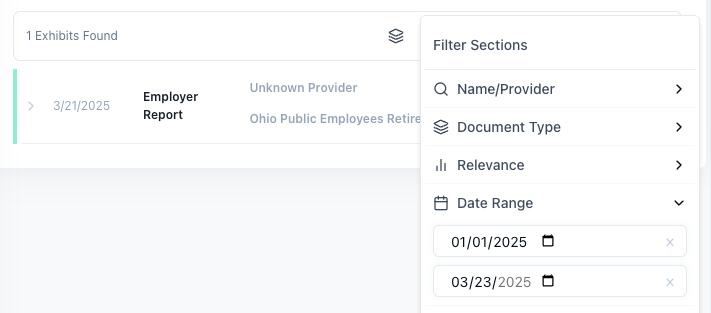
Date Range
Date Range
The Date Range filter allows you to choose which records to include based on the date range.To filter by date, enter a start date in the first field and an end date in the second field.Click on the “x” icon to clear the date range filter.